OpenAI’s ChatGPT-3(Generative Pre-trained Transformer) is one of the most powerful AI chatbots right now. You can ask anything and it gives the precise answers of it. OpenAI also provides API to implement it in the programming. In this article, we will see how to create a Chat GPT-3 web app with Streamlit in python using API.
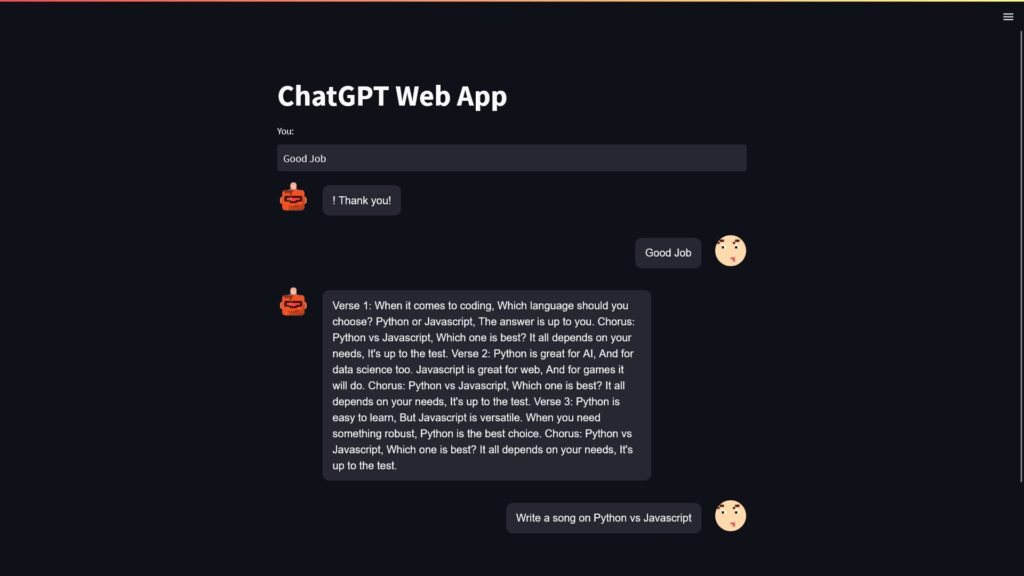
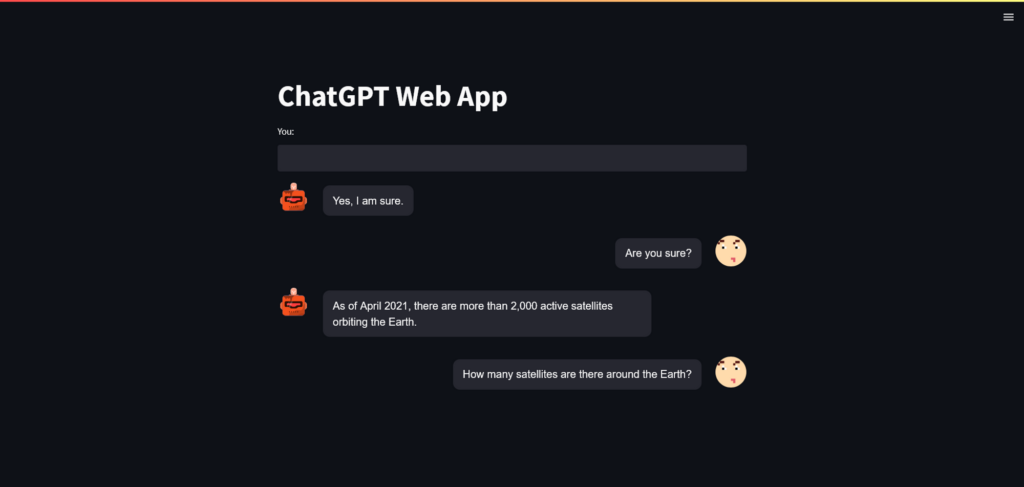
After creating this, your Streamlit web app will look like this:
Required Libraries for ChatGPT-3 Python
You have to install three libraries to make this:
- Streamlit (
pip install streamlit) - Streamlit Chat (
pip install streamlit_chat) - Open AI(
pip install openai) - (Optional) Dotenv(
pip install python-dotenv)
Streamlit will help to build a web app. By Streamlit we can make the web app very quickly.
Streamlit Chat is another open-source library that you can use to show previous messages between the user and the bot. Therefore we can use it to build our ChatGPT-3.
And finally, we will need the brain of our app which is Open AI’s library.
Get API Key for ChatGPT
To use the Chat GPT-3 you will need the API key. To get this you will have to go to OpenAI’s website. After login, go to View API Keys.
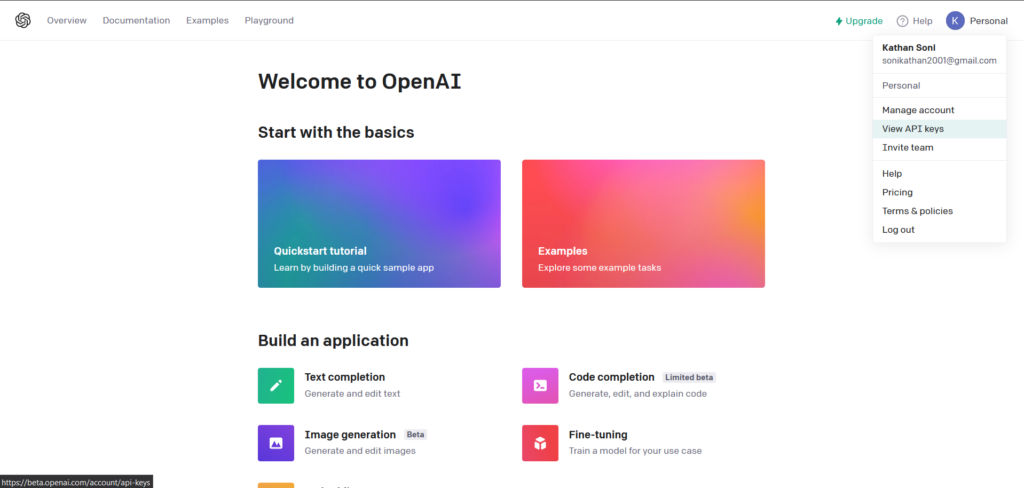
After that click on Create new Secret key. And copy the generated API key and Paste it somewhere else. Because you’ll never be able to see this key ever again.
Implementation of ChatGPT-3 in Python
Now comes the main part of creating ChatGPT-3 in python. Here is the program for it.
import openai
import streamlit as st
from streamlit_chat import message
import os
from dotenv import load_dotenv

load_dotenv('api_key.env')

openai.api_key = os.environ.get('API_KEY')

def generate_response(prompt):
    completion=openai.Completion.create(
        engine='text-davinci-003',
        prompt=prompt,
        max_tokens=1024,
        n=1,
        stop=None,
        temperature=0.6,
    )

    message=completion.choices[0].text
    return message
Let’s understand code. First, we have imported our required libraries. Then you will need to paste your API key which you got in the openai.api_key method. I have imported it from the .env file.
After that, I created a function for ChatGPT-3 called generate_response. Which is taking the user prompt as a parameter.
In the function, we are using openai.Completion.create a function to use GPT-3. In that function,
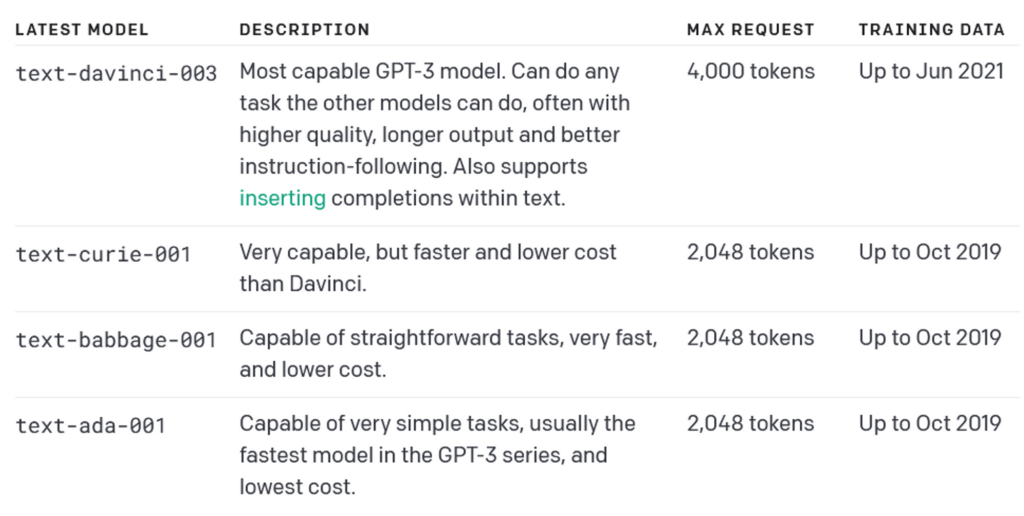
engine: The engine type of ChatGPT-3. Here we are using 'text-davinci-003' engine. It is the most powerful GPT-3 model. But here is other models that you can use too.
prompt: The User query
max_tokens: It is the upper bound on the length of the generated code. You can adjust it according to your use case.
n: If it is set to 1 means it will give only one answer to the prompt.
stop: It is used for the exit statements for the model.
temperature: This parameter is the most important parameter in the function. Its range is between 0 to 1.
If you set it to 0 then it will produce stable and accurate output and 1 will produce inconsistent and sometimes creative sentences. If you want to learn more about this then go here.
And finally, I returned message=completion.choices[0].text. This contains the answer that is generated by GPT-3.
Also read: Gradio: Easy Guide for making ML web app for beginners
Creating Chat GPT-3 web app with Streamlit
Now comes the building Chat GPT-3 web app with Streamlit.
import openai
import streamlit as st
from streamlit_chat import message

openai.api_key = "{YOUR API KEY}"

def generate_response(prompt):
    completion=openai.Completion.create(
        engine='text-davinci-003',
        prompt=prompt,
        max_tokens=1024,
        n=1,
        stop=None,
        temperature=0.8,
    )

    message=completion.choices[0].text
    return message

st.title("ChatGPT Web App")

#storing the chat

if 'generated' not in st.session_state:
    st.session_state['generated'] = []

if 'past' not in st.session_state:
    st.session_state['past'] = []

user_input=st.text_input("You:",key='input')

if user_input:
    output=generate_response(user_input)

    #store the output
    st.session_state['past'].append(user_input)
    st.session_state['generated'].append(output)

if st.session_state['generated']:

    for i in range(len(st.session_state['generated'])-1, -1, -1):
        message(st.session_state["generated"][i], key=str(i))
        message(st.session_state['past'][i], is_user=True, key=str(i) + '_user')
After giving the title we are using the session_state method of Streamlit. If you don’t know about the session state let me explain it to you in short.
Session state is used to store the value of the parameter’s value of the widget’s value in memory per session. It stores the value in the key and value pair. If you want to learn more then you can go here.
Then we are taking user input via text_input. The key is used to store the key name ‘input’ and its value to the session state.
After that, we are appending the answer and the user query in the session state. In the last step, we are displaying it by looping over the session state.
And that’s it. Your Chat GPT-3 web app with Streamlit is ready to use.
Run streamlit run {filename}.py and you will see your web app ready to use.
That’s how you can implement OpenAI’s ChatGPT-3web app with Streamlit. If you face any problems, let me know in the comment.